WCP Widget Server Developer Guide
A practical guide to building widget servers that integrate with Widget Context Protocol hosts. All examples use Python and Flask — the same technology stack as the reference widget implementations.
The guide is written for developers who have not yet read the WCP specification. As you work through each section you will naturally absorb the specification concepts that underpin it. Think of it as wading into a lake — you start at the edge with your feet in the water, and as your confidence grows you wade deeper, until you are swimming comfortably in the full protocol. By the end of the guide you will be ready to read the specification as a reference document rather than an introduction.
How to use this guide
Every section ends with a ↗ Spec ref link pointing to the corresponding section of the WCP specification. Follow those links as you go — the spec is precise, this guide is practical. Together they give you the complete picture.
The examples progress from a 20-line server that does almost nothing, to a full four-component widget with runtime state management, podium integration, and Docker packaging. You can stop at any depth that suits your project.
The WCP vocabulary
Before writing any code, it helps to understand where WCP's terminology comes from and why it uses the words it does. The vocabulary is deliberately implementation-agnostic — it does not name any specific UI control, any particular framework, or any platform convention. This is by design: WCP hosts can be built in Electron, .NET MAUI, a plain browser, or anything else. The terminology must transcend all of them.
Roots in IT: instrumentation and orchestration
Two concepts from the broader information technology landscape inform the WCP model. The first is instrumentation — the practice of presenting live, changing data through visual displays. Server monitoring dashboards, IoT sensor panels, financial trading screens, and telemetry consoles are all instrumentation: each individual display is an instrument, and together they give an operator a comprehensive, real-time view of a system. A WCP widget is, at heart, an instrument — a self-contained visual unit that presents data, accepts interaction, and operates independently of its neighbours.
The second concept is orchestration — the deliberate arrangement and coordination of multiple components into a coherent whole. In IT, orchestration describes how containers, services, or workflows are assembled and managed together. In WCP, an orchestration is a named, saveable arrangement of instruments across the host's surfaces: which widgets are present, where they are placed, how they are sized, and what configuration they carry. Switching orchestrations changes the entire composition. Exporting one shares it with others.
The musical metaphor
With instruments and orchestrations already in our vocabulary, we are naturally drawn toward the musical realm — and it turns out to be a remarkably productive source of abstractions. A symphony orchestra brings together diverse instruments, each with its own character and capability, coordinated by a score into a unified performance. That score is the orchestration. The instruments are the players. And the surface on which the music is written — the horizontal lines of sheet music — are called staves.
WCP adopts this metaphor fully. A stave is the grid surface on which
instruments are placed. It is defined as a 12-column fluid-width grid,
where each column is approximately 8.3% of the available width, and each row is
100px tall. When you see a widget's defaultSize expressed
as {"w": 4, "h": 3}, that means four columns wide (one-third of the stave)
and three rows tall (300px). The word "stave" was chosen precisely because it does not
imply any specific UI control — not a tab, not a panel, not a page, not a window. Any
surface that presents the 12-column grid is a stave, regardless of how the host
implements it.
↗ Spec: Layout Grid
defaultSize in columns and rows, and the host handles the rest. Whether
the host renders your widget inside a tab, a floating window, a scrollable panel, or
a full-screen kiosk — from your server's perspective, it is always a stave.
The host layout model
Continuing the sheet-music analogy, a WCP host has three spatial zones — mirroring the structure of a musical score page:
- Podium — the strip above the staves, always visible. In an
orchestra, the conductor's podium is the elevated platform at the front from which the
entire performance is directed — where control happens, where tempo and dynamics are
set. In a WCP host, the podium holds compact controls and scrolling tickers: a
play/stop button, a live status LED, a "now playing" marquee. Podium components are
narrow, fixed-height, and designed for glanceable information and direct interaction.
The current WCP specification and host implementations refer to this zone as the masthead. In the manifest, podium components use the roles"control"and"ticker", and declare"mastheadCapable": true. - Staves — the main area. One or more stave grids where instruments are placed, sized, and arranged. This is where the music is written — where the rich, interactive content lives. A host may present multiple staves as tabs, as vertically stacked panels, or as any other layout mechanism. The widget does not need to know which.
- Coda Planned — the strip below the staves, reserved for a future WCP version. In music, the coda (Italian for "tail") is the concluding passage that follows the main body of a composition — it provides closure, summary, or final commentary. A WCP coda will serve a similar purpose: persistent status, navigation, or summary components that anchor the bottom of the layout, complementing the main instrument area from below.
This three-zone model — podium, staves, coda — is the complete
spatial vocabulary of a WCP host. Every widget component you build will appear in one of
these zones. The component's role field declares where it belongs:
"widget" for a stave instrument, "control" or
"ticker" for the podium. Coda roles will be defined in a future
specification version.
Orchestration in practice
An orchestration is a named snapshot of the entire host state: which instruments are on which staves, in what positions and sizes, with what configuration; which controls and tickers are on the podium; and what metadata (name, icon, display name) identifies the arrangement. A user might create one orchestration for monitoring their infrastructure (Cloudflare widgets, GitHub repos), another for media (radio player, weather ticker), and a third that serves as a standalone radio application launched from a kiosk. Each orchestration is independent — switching between them replaces the entire composition.
As a widget developer, orchestrations affect you through the
Wcp-Orchestration-Id header. Every request your server receives carries the
orchestration's UUID, telling you which composition is currently active. You use this to
scope runtime state so that two orchestrations containing the same widget don't
contaminate each other — the same principle as two different performances of the same
symphony, each with its own conductor and its own interpretation.
The Container Model
The second layer of vocabulary you need before writing a line of code is containerisation. WCP widget servers are distributed as containers. Every example in this guide that involves running, packaging, or publishing a server will use containers. You do not need prior experience — this section gives you everything you need to understand what is happening and why.
The shipping-container analogy
Before the 1950s, cargo was loaded onto ships piece by piece — every port handled goods differently, loading times were unpredictable, and damage in transit was common. The invention of the standardised intermodal shipping container changed everything. A sealed metal box of standard dimensions could be stacked on a ship, transferred to a train, and placed on a lorry without anyone needing to know or care what was inside. The same box, the same interface, everywhere in the world.
Software containers work on the same principle. A software container packages an application together with everything it needs to run — the runtime, the libraries, the configuration — into a single, sealed unit. That unit behaves identically whether it runs on your laptop, on a colleague's machine, on a server in your office, or on a virtual machine in a data centre on another continent. The same container, the same behaviour, everywhere.
Images and containers
There are two distinct concepts that are easy to conflate at first:
- Image — the blueprint. An image is an immutable, read-only snapshot of your application and all its dependencies, captured at a specific point in time. Think of it like a recipe, or a master recording. You can copy an image, share it, publish it, and store it indefinitely. Nothing runs yet — it is just a description of something that could run.
- Container — the running instance. When you tell Docker to start a container from an image, Docker creates an isolated process on your machine using that image as its starting point. The container has its own filesystem, its own network interface, and its own process space. It is like pressing play on the master recording: the music is the same every time, but each performance is a live, running thing. You can start multiple containers from the same image simultaneously — each independent of the others.
The workflow you will follow in this guide is: write your server code → write a
Dockerfile (a short text file that describes how to build the image) →
run docker build to produce the image → run docker run to
start a container from that image. Once it is running, your widget server is accessible
at http://localhost:PORT — indistinguishable, from the outside, from a
plain Python process. The container is just the envelope it lives in.
Docker Desktop and the CLI
Docker is the dominant toolchain for building and running containers on a single machine. Docker Desktop is the application you install on your Mac or Windows computer. It includes:
- The Docker Engine — the runtime that actually creates and manages containers
- The Docker CLI — the
dockercommand available in your terminal - A graphical interface for viewing running containers, inspecting images, and managing resources
- Docker Compose — a tool for defining and starting multi-container applications from a single configuration file
Once Docker Desktop is installed and running, the docker command is
available in any terminal session — macOS Terminal, iTerm2, Windows PowerShell, WSL,
or any other shell. You do not need to interact with the graphical interface unless you
want to; everything in this guide uses the command line.
↓ Download Docker Desktop — docker.com/products/docker-desktop
Docker Desktop is free for personal use, open-source projects, and small businesses. Installation is straightforward: download, install, launch, and you are ready. No configuration is needed for the examples in this guide.
Docker Hub — the public image registry
A registry is a centralised store where container images are
published and retrieved. Docker Hub is the largest public registry —
think of it as GitHub, but for container images rather than source code. When you run
docker pull penrithbeacon/wcp-widget-radio, Docker contacts Docker Hub,
finds the image published under the penrithbeacon account, downloads it
to your machine, and makes it available for docker run.
To publish your own widget so others can pull it, you need a Docker Hub account. The free tier is sufficient — it allows unlimited public image repositories. Paid plans add private repositories and team features, but nothing in this guide requires them.
↗ Create a free Docker Hub account — hub.docker.com/signup
Your Docker Hub username becomes your image namespace. An image published as
yourusername/wcp-widget-mywidget is pullable by anyone in the world with
the command docker pull yourusername/wcp-widget-mywidget. The image name
convention used in this guide is yourusername/wcp-widget-WIDGETNAME —
the wcp-widget- prefix makes widgets easily discoverable and clearly
scoped.
Where containers can run
One of the most powerful properties of containers is that they run identically in different environments. Your widget server can be deployed in any of these contexts without changing a single line of code:
- Local machine — the most common context during development.
The container runs on your own computer and is accessible at
http://localhost:PORT. Only you can reach it (unless you configure otherwise). This is how all the examples in this guide start. - Local network — if you expose the container's port on your
machine's network interface, other devices on the same network (Wi-Fi, office LAN)
can reach it using your machine's IP address:
http://192.168.1.42:PORT. A team can share a single development widget server this way without anyone needing to install anything. - Virtual private server (VPS) or cloud host — the container runs on a remote machine (DigitalOcean, Linode, AWS EC2, or any Linux host) and is accessible at that machine's public IP address or domain name. This makes your widget available to anyone on the internet — or, if the server is inside a VPN or private network, to anyone on that private network. This is the production deployment model.
The host in the WCP model does not care which context your widget is running in — it
simply needs a URL it can reach. A widget URL of
http://localhost:3741 works exactly the same as
http://radio.example.com:3741 from the host's perspective. The container
handles the rest.
Prerequisites
- Python 3.11+ and
pip— python.org/downloads - Flask:
pip install flask - Docker Desktop — includes the Docker Engine, the
dockerCLI, and Docker Compose. Free for personal and open-source use. docker.com/products/docker-desktop - A Docker Hub account (free) — needed only if you want to publish your widget so others can pull it. Not required for local development. hub.docker.com/signup
- A WCP host to test against — Penrith Beacon is the reference host and is free to download
docker pull penrithbeacon/wcp-widget-radio
docker run -d --name radio -p 3741:3741 --restart unless-stopped \
penrithbeacon/wcp-widget-radiohttp://localhost:3741/widget/full— Full Playerhttp://localhost:3741/widget/control/radio— Radio Controlhttp://localhost:3741/widget/led— LED Indicatorhttp://localhost:3741/widget/ticker— Ticker
http://localhost:3741/widget/wcp. The full source is on
Docker Hub
(which links to the GitHub repository).
Your First Widget — Minimal Server
A WCP widget server is any HTTP server that responds to a small set of well-known paths. Let's start with the absolute minimum: a server that identifies itself and serves a single page of content.
🌊 Ankle deep
# app.py — the simplest possible WCP widget server
from flask import Flask, jsonify, render_template, Response

app = Flask(__name__)

# ── CORS — every WCP widget server must send these headers ─────────────────
@app.after_request
def cors(response):
    response.headers['Access-Control-Allow-Origin']  = '*'
    response.headers['Access-Control-Allow-Methods'] = 'GET, POST, DELETE, OPTIONS'
    response.headers['Access-Control-Allow-Headers'] = (
        'Content-Type, Wcp-Instance-Id, Wcp-Dashboard-Id, Wcp-Version, '
        'Wcp-Widget-Id, Wcp-Orchestration-Id, Wcp-Application-Id'
    )
    return response

@app.route('/widget/', methods=['OPTIONS'])
@app.route('/widget/<path:p>', methods=['OPTIONS'])
@app.route('/wcp', methods=['OPTIONS'])
def preflight(p=''):
    return Response('', status=204)

# ── The manifest — your widget's identity card ──────────────────────────────
WCP_MANIFEST = {
    "wcp":         "1.5.0",
    "uuid":        "<generate a UUID v4 here>",
    "name":        "My First Widget",
    "version":     "1.0.0",
    "description": "A simple hello-world widget.",
    "icon":        "/widget/icon.svg",
    "health":      "/widget/health",
    "components": [{
        "id":          "hello",
        "uuid":        "<another UUID v4>",
        "name":        "Hello Widget",
        "role":        "widget",
        "path":        "/widget/",
        "renderMode":  "iframe",
        "defaultSize": {"w": 4, "h": 2},
    }],
}

# ── Required WCP endpoints ───────────────────────────────────────────────────
@app.route('/widget/wcp')
def manifest(): return jsonify(WCP_MANIFEST)

@app.route('/widget/health')
def health(): return jsonify({"status": "ok", "name": WCP_MANIFEST["name"]})

@app.route('/widget/')
def widget(): return render_template("widget.html")

if __name__ == "__main__":
    app.run(host="0.0.0.0", port=8080, debug=False)
Two things to notice immediately: the CORS block and the OPTIONS preflight handler.
These are not optional — without them the host cannot make cross-origin requests to your
server, and your widget will silently fail to load. The Wcp-* headers must
all be listed even if you don't use them yet; it is a forward-compatibility requirement.
↗ Spec: CORS
Health endpoint
The host polls GET /widget/health to check whether your server is
reachable. Return a JSON object with at least "status": "ok" and
"name". A non-200 response or a network error marks the widget as
unavailable in the host UI.
Serving the iframe
The host loads your widget by pointing an <iframe> at
/widget/. Serve a complete HTML page from that route — your widget's
visible content. Here is the matching template for the server above:
<!-- templates/widget.html — minimal widget page -->
<!DOCTYPE html>
<html lang="en">
<head>
  <meta charset="UTF-8">
  <meta name="viewport" content="width=device-width, initial-scale=1.0">
  <title>My First Widget</title>
  <style>
    *, *::before, *::after { margin:0; padding:0; box-sizing:border-box; }
    html, body { width:100%; height:100%; overflow:hidden;
                 background:var(--bg, #0d1117); color:var(--text, #e6edf3);
                 font-family:-apple-system, BlinkMacSystemFont, 'Segoe UI', sans-serif; }
    .wrap { display:flex; align-items:center; justify-content:center; height:100%; }
  </style>
</head>
<body>
  <div class="wrap">Hello from my first widget!</div>
</body>
</html>--bg, --text, --accent,
etc.) into the iframe. Use them and your widget will automatically match the host's
colour scheme. Fallback values (e.g. var(--bg, #0d1117)) ensure the
widget looks reasonable even without a host.
Running in Docker
Every published WCP widget runs as a Docker container — one port, one container, one widget server. A minimal Dockerfile:
FROM python:3.12-slim
WORKDIR /app
COPY requirements.txt .
RUN pip install --no-cache-dir -r requirements.txt
COPY src/ .
EXPOSE 8080
CMD ["python", "app.py"]
And the matching docker-compose.yml for local development:
services:
  hello:
    build: .
    image: my-widget-hello
    container_name: my-widget-hello
    ports:
      - "8080:8080"
    restart: unless-stopped
Run it with docker compose up --build -d, then open your WCP host and
add the widget at http://localhost:8080.
↗ Spec: Publishing
The Manifest
The manifest is served at GET /widget/wcp and is the host's primary
source of information about your widget. Every field has meaning.
↗ Spec: Manifest
Top-level fields
| Field | Required | Description |
|---|---|---|
| wcp | required | Protocol version string — always set to the current WCP version your server targets (e.g. "1.5.0") |
| uuid | required | A stable UUID v4 that uniquely identifies this widget server. Generate once and never change it — hosts use it to recognise your widget across imports and reinstalls |
| name | required | Display name shown in the host UI |
| version | required | Your widget's own version string (semver recommended) |
| description | required | Short description shown during widget discovery and in the host's widget picker |
| icon | required | Path to an SVG icon served by your server (e.g. "/widget/icon.svg") |
| health | required | Path to your health endpoint — always "/widget/health" by convention |
| components | required | Array of component definitions — at least one |
| configuration | optional | Configuration form definition — see the Configuration section |
| pages | optional | Named pages accessible via wcp:open-window or wcp:open-tab actions |
| actions | optional | Context-menu actions the host can expose to the user |
Components
A component describes one renderable unit of your widget. Most widgets have a single
component with "role": "widget". Multi-component widgets (like the radio
player) expose additional components with roles "control" or
"ticker" for masthead placement.
↗ Spec: Components
| Field | Required | Description |
|---|---|---|
| id | required | Stable string identifier within this widget (e.g. "qr-generator") |
| uuid | required | Stable UUID v4 for this specific component — different from the server UUID |
| name | required | Component display name |
| role | required | "widget" (stave instrument), "control" (podium control), or "ticker" (podium ticker) |
| path | required | URL path where this component's iframe is served (e.g. "/widget/", "/widget/control") |
| renderMode | optional | "iframe" (default) or "html" |
| defaultSize | optional | Default grid size: {"w": 4, "h": 2} — columns out of 12, rows (each 100px) |
| mastheadCapable | optional | true if this component can appear on the podium (the manifest field retains the name mastheadCapable for backward compatibility) |
| masthead | optional | Podium sizing constraints: {"height": {"min": 40, "max": 60}, "width": {"min": 160, "max": 240}} (the manifest field retains the name masthead) |
Pages and Actions
A page is a named URL within your server that can be opened in a utility window or a host tab. A full player is the most common example — a larger view where the user can browse content and make selections that feed back into the compact widget.
"pages": [{
    "id":          "full",
    "path":        "/widget/full",
    "title":       "My Widget — Full View",
    "description": "Browse and interact with full controls.",
    "window":      {"width": 480, "height": 600},
}],
"actions": [
    {"id": "open-full", "type": "wcp:open-window",
     "label": "Open Full View", "page": "full"},
    {"id": "open-tab",  "type": "wcp:open-tab",
     "label": "Open in Tab", "page": "full",
     "tab": {"title": "My Widget", "icon": "/widget/icon.svg"}, "persist": True},
]
The Radio manifest — a complete real-world example
If you have the Radio widget running locally (http://localhost:3741/widget/wcp),
you can fetch this JSON directly. It shows every manifest field in use: a server-level UUID,
four components with different roles and masthead sizing, a named page, and two actions.
{
  "wcp": "1.5.0",
  "name": "Radio",
  "version": "1.3.0",
  "description": "Internet radio player. Search thousands of stations, play directly in the dashboard or masthead.",
  "uuid": "f839cffc-573b-48fd-b7d6-1dc2b1aa8699",
  "icon": "/widget/icon.svg",
  "health": "/widget/health",
  "components": [
    {
      "id": "radio-player",
      "uuid": "fb11989e-c443-4171-9387-068025ded7a4",
      "name": "Radio Player",
      "role": "widget",
      "path": "/widget/",
      "renderMode": "iframe",
      "defaultSize": { "w": 4, "h": 4 }
    },
    {
      "id": "radio-control",
      "uuid": "0be9d536-c947-4042-af49-c5d9a2ad2c0f",
      "name": "Radio Control",
      "role": "control",
      "path": "/widget/control/radio",
      "mastheadCapable": true,
      "masthead": { "height": { "min": 40, "max": 60 }, "width": { "min": 160, "max": 240 } }
    },
    {
      "id": "radio-led",
      "uuid": "67c3fb15-eb48-4f60-a7fc-32b9e0a20032",
      "name": "Playing LED",
      "role": "control",
      "path": "/widget/led",
      "mastheadCapable": true,
      "masthead": { "height": { "min": 40, "max": 60 }, "width": { "min": 40, "max": 60 } }
    },
    {
      "id": "radio-ticker",
      "uuid": "5d781e16-5d9c-4b1d-bf0e-85cbd92b08fd",
      "name": "Radio Ticker",
      "role": "ticker",
      "path": "/widget/ticker",
      "mastheadCapable": true,
      "masthead": { "height": { "min": 40, "max": 60 } }
    }
  ],
  "pages": [{
    "id": "full", "path": "/widget/full",
    "title": "Radio — Full Player",
    "window": { "width": 480, "height": 600 }
  }],
  "actions": [
    { "id": "open-full", "type": "wcp:open-window", "label": "Open Full Player", "page": "full" },
    { "id": "open-tab",  "type": "wcp:open-tab",    "label": "Open in Tab",    "page": "full",
      "persist": true, "tab": { "title": "Radio", "icon": "/widget/icon.svg" } }
  ]
}
Widget Endpoints
Every WCP widget server exposes endpoints under the /widget/ namespace.
The host discovers and uses them in a predictable sequence.
↗ Spec: Endpoints
Required endpoints
| Path | Method | Purpose |
|---|---|---|
| /widget/wcp | GET | Returns the WCP manifest JSON. This is how the host learns about your widget. |
| /widget/health | GET | Returns {"status": "ok"}. Polled by the host to monitor availability. |
| /widget/ | GET | The main widget page — served as an iframe in the host stave. |
| /widget/icon.svg | GET | The widget's icon — an SVG. Used in the host UI and widget picker. |
Optional endpoints
| Path | Method | Purpose |
|---|---|---|
| /widget/configure | POST | Receives configuration JSON from the host when the user saves the widget's settings form. See the Configuration section. |
| /widget/full | GET | The full-view page — opened in a utility window or tab via a wcp:open-window action. |
| /widget/api/* | any | Your own data API endpoints. No naming convention is required beyond starting with /widget/. |
| /wcp | GET | Container Directory — lists all widgets in this container. Used for multi-widget containers. See the Container Directory section. |
CORS
The host page is at a different origin from your widget server (e.g.
localhost:3737 vs localhost:8080). All requests from widget
JavaScript to your server's API endpoints are cross-origin. You must handle CORS
correctly or these requests will be silently blocked by the browser.
Critically, you must also handle OPTIONS preflight requests for every
route that accepts custom request headers. The host sends preflight requests before
POST /widget/configure and before any API call that includes
Wcp-* headers.
Access-Control-Allow-Origin: *
Access-Control-Allow-Methods: GET, POST, DELETE, OPTIONS
Access-Control-Allow-Headers: Content-Type, Wcp-Instance-Id, Wcp-Dashboard-Id,
  Wcp-Version, Wcp-Widget-Id, Wcp-Orchestration-Id, Wcp-Application-Id
WCP Request Headers
When a host loads your widget, it sends a set of custom HTTP headers that give your server the context it needs to serve the right content to the right user. These headers are the heart of WCP's multi-instance model — they are what make it possible for a single container to simultaneously serve a hundred independent widget placements. ↗ Spec: WCP Request Headers
Wcp-Instance-Id are instead passed as query parameters on the iframe
src URL (e.g. /widget/?wcpInstanceId=…). Your server should read
them from headers first, falling back to query params. The helper functions below
show this pattern.
Wcp-Instance-Id — configuration isolation
A UUID generated by the host the first time a widget is placed on a stave. It identifies this specific placement of the widget — not the widget server itself, not the user, not the orchestration. One widget, placed three times in three orchestrations, produces three independent instance IDs.
Use it to key your stored configuration so each placement has its own settings:
def get_instance_id():
    iid = request.headers.get("Wcp-Instance-Id", "").strip()
    if not iid:
        iid = (request.args.get("wcpInstanceId", "") or "").strip()
    return iid
Wcp-Orchestration-Id — runtime state isolation
The UUID of the orchestration (named dashboard snapshot) currently displayed by the host. All widget components in the same orchestration share this value. Use it to key runtime state — playback position, live status, session data — so that two orchestrations that both contain your widget don't share each other's state. ↗ Spec: Wcp-Orchestration-Id
def get_orchestration_id():
    oid = request.headers.get("Wcp-Orchestration-Id", "").strip()
    if not oid:
        oid = (request.args.get("wcpOrchestrationId", "") or "").strip()
    return oid
Wcp-Application-Id — application window isolation
A UUID generated once per application window at launch time. Present only when an orchestration is running as a launched standalone application (a kiosk window), not when viewed in the design tool. Its presence distinguishes an application window from the design tool even when both display the same orchestration. ↗ Spec: Wcp-Application-Id
def get_application_id():
    aid = request.headers.get("Wcp-Application-Id", "").strip()
    if not aid:
        aid = (request.args.get("wcpApplicationId", "") or "").strip()
    return aid
The state key pattern
Combine all three context IDs into a single state key function. This gives you the correct isolation for every scenario: different orchestrations, same orchestration in design tool vs. application window, and multiple application windows of the same orchestration. ↗ Spec: Context-scoped runtime state
def get_state_key():
    """WCP 1.5.0 compound state key.
    Groups all components within the same orchestration so they share runtime state,
    while isolating them from other orchestrations and application windows."""
    orch_id = get_orchestration_id()
    app_id  = get_application_id()
    if orch_id and app_id: return f"{orch_id}:"{app_id}"
    if orch_id:            return orch_id
    return "global"  # fallback for hosts that pre-date WCP 1.5.0
Add all four functions to every widget server. They are cheap to include and make your server ready for every deployment context from the start.
Configuration
Widgets that need user-supplied settings (a location, an API key, a display
preference) expose a configuration form via the manifest's configuration
field. The host renders the form; when the user saves it, the host POSTs the values
to POST /widget/configure.
↗ Spec: Widget Configuration
🌊🌊 Knee deep
Declaring the configuration form
Add a configuration key to your manifest. The host reads the field
definitions and renders a form automatically:
"configuration": {
    "submitEndpoint": "/widget/configure",
    "fields": [
        {
            "id":          "location",
            "type":        "autocomplete",     # freetext + server-backed suggestions
            "label":       "Location",
            "placeholder": "City or region",
        },
        {
            "id":      "units",
            "type":    "select",
            "label":   "Temperature units",
            "options": [
                {"value": "celsius",    "label": "Celsius"},
                {"value": "fahrenheit", "label": "Fahrenheit"},
            ],
            "default": "celsius",
        },
    ],
}
Per-instance storage
When the host posts configuration, it includes Wcp-Instance-Id so you
know which placement is being configured. Store the config keyed by that instance ID.
Here is the pattern used by the Weather Ticker widget:
import os, json

DATA_DIR = "/app/data"
os.makedirs(DATA_DIR, exist_ok=True)

def _safe_iid(iid):
    # Defence against path traversal — only alphanumeric and hyphens
    return "".join(c for c in iid if c.isalnum() or c == "-")[:64]

def config_file_for(iid):
    iid = _safe_iid(iid)
    if not iid:
        return os.path.join(DATA_DIR, "config.json")
    return os.path.join(DATA_DIR, f"config-{iid}.json")

def read_config(iid=None):
    path = config_file_for(iid)
    try:
        with open(path) as f: return json.load(f)
    except:
        # Fall back to global config for backward compatibility
        try:
            with open(os.path.join(DATA_DIR, "config.json")) as f:
                return json.load(f)
        except: return {}

def write_config(data, iid=None):
    path = config_file_for(iid)
    os.makedirs(os.path.dirname(path), exist_ok=True)
    with open(path, "w") as f: json.dump(data, f, indent=2)
    return data

@app.route("/widget/configure", methods=["POST"])
def configure():
    iid  = get_instance_id()
    data = request.get_json(force=True) or {}
    write_config(data, iid)
    return jsonify({"success": True})
You now have per-instance configuration storage. Two placements of the same widget can have completely different settings without affecting each other.
Injecting config into templates
When the host loads the widget iframe, it sends the same Wcp-Instance-Id.
Read the stored config and inject it as a JavaScript constant so the widget page
has its settings available immediately — no extra API call needed:
# In Flask route:
@app.route("/widget/")
def widget():
    iid = get_instance_id()
    cfg = read_config(iid)
    return render_template("widget.html",
        config=cfg,
        wcp_instance_id=iid,
        wcp_orchestration_id=get_orchestration_id(),
        wcp_application_id=get_application_id()
    )

<!-- In widget.html: -->
<script>
  const WCP_INSTANCE_ID      = "{{ wcp_instance_id }}";
  const WCP_ORCHESTRATION_ID = "{{ wcp_orchestration_id|default('', true) }}";
  const WCP_APPLICATION_ID   = "{{ wcp_application_id|default('', true) }}";
  const WCP_CONFIG = {{ config | tojson }};  // {"location": "Paris", "units": "celsius"}

  // Now use WCP_CONFIG directly — no async fetch needed
  const units = WCP_CONFIG.units || "celsius";
</script>
The wcpFetch helper
Any fetch calls your widget makes back to its own server should include the
context headers. Define a wcpFetch helper once at the top of each
template's script block and use it everywhere instead of raw fetch:
function wcpFetch(url, opts) {
  opts = opts || {};
  const extra = {};
  if (WCP_ORCHESTRATION_ID) extra['Wcp-Orchestration-Id'] = WCP_ORCHESTRATION_ID;
  if (WCP_APPLICATION_ID)   extra['Wcp-Application-Id']   = WCP_APPLICATION_ID;
  opts.headers = Object.assign({}, opts.headers || {}, extra);
  return fetch(url, opts);
}

// All API calls go through wcpFetch:
const data = await wcpFetch('/widget/api/weather').then(r => r.json());WCP_INSTANCE_ID) and used to key configuration. The orchestration
and application headers identify runtime context — which orchestration is
showing, which application window is active — which is what runtime state needs.
Runtime State
Configuration (covered above) is persistent data the user sets up once. Runtime state is transient data that changes during use — what is currently playing, what is the current live reading, what mode is the widget in. They require different storage strategies. ↗ Spec: Context-scoped runtime state
🌊🌊🌊 Waist deep
Single-component state
For a widget with one component (like QR Generator or Weather Ticker), state is conceptually simple. The component is the only actor — it reads and writes its own state. The state key scopes it to the orchestration so two orchestrations don't bleed into each other:
# Server-side: in-memory state store keyed by orchestration context
_DEFAULT_STATE = {"playing": False, "value": ""}
_states = {}

def _state_for(key):
    if key not in _states:
        _states[key] = dict(_DEFAULT_STATE)
    return key

@app.route("/widget/api/state", methods=["GET", "POST"])
def widget_state():
    key = _state_for(get_state_key())
    if request.method == "POST":
        data = request.get_json(force=True) or {}
        _states[key].update({k: data[k] for k in data if k in _DEFAULT_STATE})
        return jsonify({"ok": True})
    return jsonify(_states[key])
Multi-component state
This is where the compound state key shows its full value. Consider the radio
widget: it has four components — a stave player, a masthead control, a LED indicator,
and a ticker. They are all rendered as separate iframes. They each have their own
Wcp-Instance-Id, but they all share the same
Wcp-Orchestration-Id.
When the control plays a station, it writes to the server state using the orchestration key. When the LED polls the same endpoint with the same orchestration key, it sees the playing state and goes green. All four components are automatically coordinated through a single server-side bucket — without any knowledge of each other's instance IDs.
Server-side state store
In-memory state (a Python dict) is sufficient for runtime state — it does not need to survive server restarts. When the container restarts, state resets to defaults; components will repopulate it as they are used. For configuration (user-set values), persist to files as shown in the Configuration section.
# Full pattern from the radio widget:
_DEFAULT_STATE = {
    "playing": False, "station": "", "country": "", "station_url": ""
}
_states = {}  # { state_key: { ...DEFAULT_STATE } }

def _state_for(key):
    if key not in _states:
        _states[key] = dict(_DEFAULT_STATE)
    return key

@app.route("/widget/api/state", methods=["GET", "POST"])
def widget_state():
    key = _state_for(get_state_key())
    if request.method == "POST":
        data = request.get_json(force=True) or {}
        _states[key].update({k: data[k] for k in data if k in _DEFAULT_STATE})
        return jsonify({"ok": True})
    return jsonify(_states[key])
Each component template injects the state key helpers and polls this endpoint via
wcpFetch. Because wcpFetch sends Wcp-Orchestration-Id
and Wcp-Application-Id headers, the server correctly routes each request
to the right state bucket — even when the same widget server is serving two different
orchestrations simultaneously, or when a kiosk application and the design tool both
display the same orchestration.
Masthead Components
A masthead component is a widget component with "mastheadCapable": true
in its manifest definition. It is rendered in the host's masthead bar — the thin
strip above the stave — rather than on the stave itself. Controls appear on the left
or right of the masthead; tickers fill the centre strip.
↗ Spec: Component Contexts
🌊🌊🌊🌊 Chest deep
Controls
A control is a compact interactive component — a play button, a status indicator,
a toggle. Mark a component as a control with "role": "control". The
host places it in the masthead and sizes it according to the masthead
sizing constraints:
{
    "id":            "radio-control",
    "uuid":          "<uuid>",
    "name":          "Radio Control",
    "role":          "control",
    "path":          "/widget/control/radio",
    "mastheadCapable": True,
    "masthead": {
        "height": {"min": 40, "max": 60},
        "width":  {"min": 160, "max": 240},
    },
}
Tickers
A ticker fills the horizontal space between the left and right controls. It scrolls
or displays live information — "Now playing: BBC Radio 4", a weather reading, a
status message. Use "role": "ticker". Tickers have no fixed width — they
expand to fill available space:
{
    "id":            "radio-ticker",
    "uuid":          "<uuid>",
    "name":          "Radio Ticker",
    "role":          "ticker",
    "path":          "/widget/ticker",
    "mastheadCapable": True,
    "masthead": {"height": {"min": 40, "max": 60}},
}
LED indicators
A small square indicator (like the radio's play/stop LED) is also a
"control" with a tight square width constraint:
{
    "id":            "radio-led",
    "role":          "control",
    "path":          "/widget/led",
    "mastheadCapable": True,
    "masthead": {
        "height": {"min": 40, "max": 60},
        "width":  {"min": 40, "max": 60},
    },
}
Each masthead component is served as a separate Flask route and HTML template. They receive the same context headers as stave components. Because they share the orchestration ID with the stave player widget, they automatically read from the same state bucket — no special wiring required.
Multi-Component Widgets
The radio widget is the reference implementation for a multi-component widget design. It exposes four components: a stave player, a masthead control, a LED, and a ticker. Together they form a cohesive internet radio experience across the stave and masthead simultaneously.
🌊🌊🌊🌊🌊 Swimming
Designing a component suite
Each component has its own template and its own Flask route. They all share the
same _states dictionary on the server, keyed by orchestration context.
The user adds components independently from the host's widget picker — they don't need
to be added together. All four components can function independently; when combined,
they enhance each other.
localhost:3741, open all four browser tabs side by side. Search for a
station in the Full Player and press play. You will see the LED turn green, the
ticker begin scrolling the station name, and the Radio Control update to show
"LIVE" — all simultaneously. None of these components communicated directly with
each other; they all read from the shared state store at
/widget/api/state. Now press stop on the compact control instead of
the full player — the same cascade happens in reverse. This is the pattern.
The full player
The full player is a larger view opened in a separate utility window. It is served
at /widget/full and declared as a page in the manifest. From the compact
widget or control, the user opens it, browses content, and makes a selection. The
selection is broadcast to the server state so the control and other components pick it
up on their next poll.
When opening the full player, pass the orchestration and application IDs so the full player's server receives them and can write to the correct state bucket:
// In the widget/control template:
function openFull() {
  let fullUrl = window.location.origin + '/widget/full';
  if (WCP_ORCHESTRATION_ID)
    fullUrl += '?wcpOrchestrationId=' + encodeURIComponent(WCP_ORCHESTRATION_ID);
  if (WCP_APPLICATION_ID)
    fullUrl += '&wcpApplicationId='   + encodeURIComponent(WCP_APPLICATION_ID);

  window.parent?.postMessage({
    type: 'wcp:open-window',
    url:  fullUrl,
    page: 'full',
    width: 480, height: 600,
  }, '*');
}
The full player template also needs the context constants and the
wcpFetch helper — inject them the same way as in other templates. When
the user selects a station and presses play, the full player calls
wcpFetch('/widget/api/state', { method: 'POST', ... }) to write the
playing state to the server, and window.parent?.postMessage(radio:state)
to signal the host. The host can re-broadcast this message to sibling iframes for
immediate UI updates.
postMessage Protocol
Widget components communicate with the host page via window.parent.postMessage.
The host handles specific wcp: message types and acts on the widget's behalf
(opening windows, copying to clipboard, managing tabs). Widgets cannot use
window.open or navigator.clipboard directly because they run
in sandboxed iframes.
↗ Spec: postMessage Protocol
| Message type | Purpose | Key fields |
|---|---|---|
| wcp:open-window | Open a URL in a utility window | url, page, width, height |
| wcp:open-tab | Open a URL as a host tab | url, page, tab.title, tab.icon, persist |
| wcp:copy-to-clipboard | Copy text — bypasses iframe clipboard sandbox | text |
| wcp:download-file | Trigger a file download | filename, dataUrl |
State broadcast pattern
Widget components that maintain shared runtime state (like the radio suite) can broadcast state changes to the host via a custom message. The host may re-broadcast this message to all sibling iframes, giving other components immediate notification without waiting for their next server poll. This is a design pattern — not a WCP protocol requirement — so both server polling (the guaranteed path) and message broadcast (the fast path) should be implemented.
When you pressed play in the Radio masterclass exercise and watched the LED turn
green and the ticker start simultaneously, you were seeing this pattern in action.
The full player called broadcast(), which posted a message to the host
and wrote to /widget/api/state. The LED and ticker — which poll
state on an interval — both picked up the change within their next poll cycle.
The host re-broadcast the postMessage so the response felt instantaneous.
// Broadcast state to host and write to server:
function broadcast() {
  // Signal the host (host re-broadcasts to sibling iframes if supported)
  window.parent?.postMessage({
    type: 'radio:state',
    url: currentStation?.url || '',
    name: currentStation?.name || '',
    playing,
  }, '*');

  // Write to server state (guaranteed path — all components poll this)
  wcpFetch('/widget/api/state', {
    method: 'POST',
    headers: {'Content-Type': 'application/json'},
    body: JSON.stringify({ playing, station: currentStation?.name || '' }),
  }).catch(() => {});
}
Docker and Publishing
WCP widgets are distributed as Docker images. The container exposes a single HTTP port and runs the Flask server. When a user imports a widget, their WCP host pulls the image and starts the container. ↗ Spec: Publishing
🌊🌊🌊🌊🌊🌊 Deep water
Production Dockerfile
FROM python:3.12-slim
WORKDIR /app
COPY requirements.txt .
RUN pip install --no-cache-dir -r requirements.txt
COPY src/ .
EXPOSE 8080
CMD ["python", "app.py"]
Keep the Dockerfile simple. Do not run in debug mode in production. Store any
persistent data in a volume mount (e.g. /app/data) so it survives
container restarts.
Container Directory
If your container hosts more than one widget, expose a Container Directory at
GET /wcp (note: at the root, not under /widget/). The
host queries this endpoint first and presents a picker to the user if multiple widgets
are found.
↗ Spec: Container Directory
@app.route("/wcp")
def container_directory():
    return jsonify({
        "type":    "directory",
        "wcp":     "1.5.0",
        "widgets": [{
            "id":          "my-widget",
            "uuid":        WCP_MANIFEST["uuid"],
            "name":        WCP_MANIFEST["name"],
            "description": WCP_MANIFEST["description"],
            "icon":        WCP_MANIFEST["icon"],
            "manifest":    "/widget/wcp",
        }]
    })
Single-widget containers should implement this endpoint anyway — hosts use it for
discovery. If you have only one widget, the host falls through to
GET /widget/wcp automatically.
Publishing to Docker Hub
Publishing your widget image to Docker Hub makes it available to anyone in the world
with a single docker pull command — no installation instructions, no
dependency lists, no configuration. This is how penrithbeacon/wcp-widget-radio
became available to you earlier in this guide.
You need a free Docker Hub account before you can push. Create one at hub.docker.com/signup if you haven't already. Then log in from your terminal:
docker loginEnter your Docker Hub username and password when prompted. Once authenticated, your
pushes will go to your account's namespace. If your username is alice, your
images will be at docker.io/alice/wcp-widget-mywidget and pullable as
docker pull alice/wcp-widget-mywidget.
Tag your image with both a version tag and a latest tag. The version
tag encodes both the widget version and the WCP version it targets:
docker build \
  -t penrithbeacon/wcp-widget-my-widget:1.0.0-wcp1.5.0 \
  -t penrithbeacon/wcp-widget-my-widget:latest \
  .

docker push penrithbeacon/wcp-widget-my-widget:1.0.0-wcp1.5.0
docker push penrithbeacon/wcp-widget-my-widget:latest
This naming convention allows users to pin to a specific WCP-compatible version
while still being able to pull :latest for the most recent release.
Masterclass — The Radio Widget
The old masters learned to paint by copying the masters who came before them. Once they could reproduce what they saw with precision, they had the technique to develop their own voice. The Radio widget is your masterclass: a complete, production WCP 1.5.0 widget with four components, runtime state management, podium integration, and Docker packaging — all working, all real, all right-click-viewable.
Pull it, run it, open four browser windows, and read the source. By the time you have done that, you will have a deeper understanding of WCP than any amount of reading can provide alone.
Docker Hub — penrithbeacon/wcp-widget-radio ↗ GitHub — penrithbeacon ↗
Pull and run
docker pull penrithbeacon/wcp-widget-radio
docker run -d --name radio -p 3741:3741 --restart unless-stopped \
  penrithbeacon/wcp-widget-radio
Open four browser tabs
| URL | Component | Role |
|---|---|---|
http://localhost:3741/widget/full | Full Player | widget (full page) |
http://localhost:3741/widget/control/radio | Radio Control | control |
http://localhost:3741/widget/led | LED Indicator | control |
http://localhost:3741/widget/ticker | Ticker | ticker |
In the Full Player, search for a station (try typing a city name or genre) and press
Play. Watch all four tabs respond simultaneously — the LED turns green, the ticker begins
scrolling the station name, and the control updates to show a live state indicator. Press
Stop on the compact control and everything reverses. You are seeing the shared state
pattern (/widget/api/state) and the postMessage broadcast working together.
Also try the Theme Studio widget to see the host theme system in action:
docker pull penrithbeacon/wcp-widget-theme-studio
docker run -d --name theme-studio -p 3740:3740 --restart unless-stopped \
  penrithbeacon/wcp-widget-theme-studio
Open http://localhost:3740/widget/full and browse the built-in themes.
Notice the CSS custom property names — these are the variables that every well-behaved
WCP widget reads from :root.
The manifest
Fetched verbatim from http://localhost:3741/widget/wcp. Four components,
a named page, two actions, WCP 1.5.0.
{"wcp":"1.5.0","name":"Radio","version":"1.3.0",
"description":"Internet radio player. Search thousands of stations, play directly in the dashboard or masthead.",
"uuid":"f839cffc-573b-48fd-b7d6-1dc2b1aa8699",
"icon":"/widget/icon.svg","health":"/widget/health",
"components":[
  {"id":"radio-player","uuid":"fb11989e-c443-4171-9387-068025ded7a4",
    "name":"Radio Player","role":"widget","path":"/widget/",
    "renderMode":"iframe","defaultSize":{"w":4,"h":4}},
  {"id":"radio-control","uuid":"0be9d536-c947-4042-af49-c5d9a2ad2c0f",
    "name":"Radio Control","role":"control","path":"/widget/control/radio",
    "mastheadCapable":true,
    "masthead":{"height":{"min":40,"max":60},"width":{"min":160,"max":240}}},
  {"id":"radio-led","uuid":"67c3fb15-eb48-4f60-a7fc-32b9e0a20032",
    "name":"Playing LED","role":"control","path":"/widget/led",
    "mastheadCapable":true,
    "masthead":{"height":{"min":40,"max":60},"width":{"min":40,"max":60}}},
  {"id":"radio-ticker","uuid":"5d781e16-5d9c-4b1d-bf0e-85cbd92b08fd",
    "name":"Radio Ticker","role":"ticker","path":"/widget/ticker",
    "mastheadCapable":true,
    "masthead":{"height":{"min":40,"max":60}}}
],
"pages":[{"id":"full","path":"/widget/full","title":"Radio — Full Player",
  "description":"Search and play internet radio stations.",
  "window":{"width":480,"height":600}}],
"actions":[
  {"id":"open-full","type":"wcp:open-window","label":"Open Full Player","page":"full"},
  {"id":"open-tab","type":"wcp:open-tab","label":"Open in Tab","page":"full",
    "persist":true,"tab":{"title":"Radio","icon":"/widget/icon.svg"}}
]}
Source: Full Player
The full-page view — search, browse, and play. Opens in a host utility window or tab. Right-click → View Page Source in your browser to see this exactly.
<!DOCTYPE html>
<html lang="en">
<head>
<meta charset="UTF-8">
<meta name="viewport" content="width=device-width, initial-scale=1.0">
<title>Radio — Full Player</title>
<style>
*{margin:0;padding:0;box-sizing:border-box;}
html,body{width:100%;height:100%;overflow:hidden;background:var(--bg,#0d1117);color:var(--text,#e6edf3);font-family:-apple-system,BlinkMacSystemFont,'Segoe UI',sans-serif;font-size:13px;}
.layout{display:flex;flex-direction:column;height:100%;}
.player{padding:16px;background:var(--surface,#161b22);border-bottom:1px solid var(--border,#30363d);display:flex;flex-direction:column;gap:8px;}
.now-playing{font-weight:600;font-size:15px;white-space:nowrap;overflow:hidden;text-overflow:ellipsis;}
.now-meta{font-size:12px;color:var(--muted,#8b949e);white-space:nowrap;overflow:hidden;text-overflow:ellipsis;}
.ctrl-row{display:flex;gap:8px;align-items:center;}
.btn-play{background:var(--accent,#f0883e);border:none;border-radius:50%;width:40px;height:40px;cursor:pointer;color:#0d1117;font-size:18px;display:flex;align-items:center;justify-content:center;flex-shrink:0;}
.btn-play:hover{opacity:.85;}
.vol{flex:1;accent-color:var(--accent,#f0883e);}
.status{font-size:11px;color:var(--muted,#8b949e);}
.status.playing{color:var(--green,#3fb950);}
.status.error{color:var(--red,#f85149);}
.search-bar{display:flex;gap:6px;padding:10px 12px;border-bottom:1px solid var(--border,#30363d);}
.search-bar input{flex:1;background:var(--surface2,#1c2128);border:1px solid var(--border,#30363d);border-radius:6px;color:var(--text,#e6edf3);padding:6px 10px;font-size:13px;font-family:inherit;}
.search-bar input::placeholder{color:var(--muted,#8b949e);}
.search-bar button{background:var(--accent,#f0883e);border:none;border-radius:6px;color:#0d1117;font-weight:600;padding:6px 14px;cursor:pointer;font-size:12px;font-family:inherit;}
.list{flex:1;overflow-y:auto;padding:6px;}
.station{display:flex;align-items:center;gap:10px;padding:8px 10px;border-radius:6px;cursor:pointer;transition:background .15s;}
.station:hover,.station.active{background:rgba(240,136,62,.1);}
.station.active{border-left:2px solid var(--accent,#f0883e);}
.sfav{width:28px;height:28px;border-radius:4px;object-fit:cover;flex-shrink:0;background:var(--surface2,#1c2128);}
.sname{font-weight:500;font-size:13px;white-space:nowrap;overflow:hidden;text-overflow:ellipsis;}
.smeta{font-size:11px;color:var(--muted,#8b949e);}
.loading{text-align:center;padding:24px;color:var(--muted,#8b949e);}
</style>
</head>
<body>
<div class="layout">
  <div class="player">
    <div class="now-playing" id="np-name">No station selected</div>
    <div class="now-meta" id="np-meta">Search below to find a station</div>
    <div class="ctrl-row">
      <button class="btn-play" id="btn-play" onclick="togglePlay()">▶</button>
      <input class="vol" type="range" id="vol" min="0" max="1" step="0.05" value="0.8" oninput="setVol(this.value)">
    </div>
    <div class="status" id="status">—</div>
  </div>
  <div class="search-bar">
    <input id="q" type="text" placeholder="Search stations…" onkeydown="if(event.key==='Enter')search()">
    <button onclick="search()">Search</button>
  </div>
  <div class="list" id="list"><div class="loading">Loading popular stations…</div></div>
</div>
<audio id="audio" preload="none"></audio>
<script>
const WCP_ORCHESTRATION_ID = "";
const WCP_APPLICATION_ID   = "";
function wcpFetch(url, opts) {
  opts = opts || {};
  const extra = {};
  if (WCP_ORCHESTRATION_ID) extra['Wcp-Orchestration-Id'] = WCP_ORCHESTRATION_ID;
  if (WCP_APPLICATION_ID)   extra['Wcp-Application-Id']   = WCP_APPLICATION_ID;
  opts.headers = Object.assign({}, opts.headers || {}, extra);
  return fetch(url, opts);
}
const audio = document.getElementById('audio');
const btnPlay = document.getElementById('btn-play');
const statusEl = document.getElementById('status');
let currentStation = null, playing = false, activeEl = null;

async function loadTop() {
  try {
    const r = await fetch('/widget/api/top');
    const d = await r.json();
    renderList(d.results || []);
  } catch { document.getElementById('list').innerHTML = '<div class="loading">Could not load stations</div>'; }
}

async function search() {
  const q = document.getElementById('q').value.trim();
  if (!q) return;
  document.getElementById('list').innerHTML = '<div class="loading">Searching…</div>';
  try {
    const r = await fetch('/widget/api/search?q=' + encodeURIComponent(q));
    const d = await r.json();
    renderList(d.results || []);
  } catch { document.getElementById('list').innerHTML = '<div class="loading">Search failed</div>'; }
}

function renderList(stations) {
  const list = document.getElementById('list');
  if (!stations.length) { list.innerHTML = '<div class="loading">No stations found</div>'; return; }
  list.innerHTML = stations.map(s => `
    <div class="station" data-uuid="${s.stationuuid}" data-url="${s.url_resolved}" data-name="${s.name}" onclick="selectStation(this)">
      <img class="sfav" src="${s.favicon||''}" onerror="this.style.display='none'" alt="">
      <div>
        <div class="sname">${s.name}</div>
        <div class="smeta">${s.country||''}${s.bitrate?` · ${s.bitrate}kbps`:''}${s.tags?' · '+s.tags.split(',')[0]:''}</div>
      </div>
    </div>`).join('');
}

function selectStation(el) {
  if (activeEl) activeEl.classList.remove('active');
  activeEl = el;
  el.classList.add('active');
  currentStation = { url: el.dataset.url, name: el.dataset.name };
  document.getElementById('np-name').textContent = currentStation.name;
  document.getElementById('np-meta').textContent = '';
  play();
}

function play() {
  if (!currentStation) return;
  audio.src = currentStation.url;
  audio.volume = parseFloat(document.getElementById('vol').value);
  audio.play().catch(() => setStatus('error', 'Stream error'));
  playing = true;
  btnPlay.textContent = '⏸';
  setStatus('playing', '● Live');
  broadcast();
}
function stop() {
  audio.pause(); audio.src = '';
  playing = false; btnPlay.textContent = '▶';
  setStatus('', '—'); broadcast();
}
function togglePlay() { playing ? stop() : (currentStation ? play() : null); }
function setVol(v) { audio.volume = parseFloat(v); }
function setStatus(cls, txt) { statusEl.className = 'status ' + cls; statusEl.textContent = txt; }
function broadcast() {
  window.parent?.postMessage({ type: 'radio:state', url: currentStation?.url||'', name: currentStation?.name||'', playing }, '*');
  wcpFetch('/widget/api/state', { method: 'POST', headers: {'Content-Type':'application/json'},
    body: JSON.stringify({ playing, station: currentStation?.name||'', station_url: currentStation?.url||'' }) }).catch(()=>{});
}
audio.addEventListener('error', () => setStatus('error', 'Stream unavailable'));
audio.addEventListener('playing', () => setStatus('playing', '● Live'));
audio.addEventListener('waiting', () => setStatus('', 'Buffering…'));
// Clear server state when this tab/window is closed so LED goes red
window.addEventListener('beforeunload', () => {
  wcpFetch('/widget/api/state', { method: 'POST', keepalive: true,
    headers: {'Content-Type':'application/json'},
    body: JSON.stringify({ playing: false, station: currentStation?.name||'' }) });
});
loadTop();
</script>
</body>
</html>
Source: Compact Widget
The compact stave instrument — 4×4 default. Shows current station and play/stop controls.
<!DOCTYPE html>
<html lang="en">
<head>
<meta charset="UTF-8">
<meta name="viewport" content="width=device-width, initial-scale=1.0">
<title>Radio</title>
<style>
*{margin:0;padding:0;box-sizing:border-box;}
html,body{width:100%;height:100%;overflow:hidden;background:var(--bg,#0d1117);color:var(--text,#e6edf3);font-family:-apple-system,BlinkMacSystemFont,'Segoe UI',sans-serif;font-size:13px;}
.wrap{display:flex;flex-direction:column;height:100%;padding:10px;}
.station-name{font-weight:600;font-size:14px;margin-bottom:2px;white-space:nowrap;overflow:hidden;text-overflow:ellipsis;}
.station-meta{font-size:11px;color:var(--muted,#8b949e);margin-bottom:8px;white-space:nowrap;overflow:hidden;text-overflow:ellipsis;}
.controls{display:flex;gap:6px;align-items:center;margin-bottom:8px;}
.btn-play{background:var(--accent,#f0883e);border:none;border-radius:50%;width:36px;height:36px;cursor:pointer;color:#0d1117;font-size:16px;display:flex;align-items:center;justify-content:center;flex-shrink:0;}
.btn-play:hover{opacity:.85;}
.volume{flex:1;accent-color:var(--accent,#f0883e);}
.btn-full{background:none;border:1px solid var(--border,#30363d);border-radius:6px;color:var(--muted,#8b949e);cursor:pointer;padding:4px 8px;font-size:11px;font-family:inherit;}
.btn-full:hover{color:var(--text,#e6edf3);}
.status{font-size:11px;color:var(--muted,#8b949e);margin-bottom:6px;}
.status.playing{color:var(--green,#3fb950);}
.status.error{color:var(--red,#f85149);}
</style>
</head>
<body>
<div class="wrap">
  <div class="station-name" id="sname">No station selected</div>
  <div class="station-meta" id="smeta">Click full player to search stations</div>
  <div class="controls">
    <button class="btn-play" id="btn-play" onclick="togglePlay()">▶</button>
    <input class="volume" type="range" id="vol" min="0" max="1" step="0.05" value="0.8" oninput="setVol(this.value)">
    <button class="btn-full" onclick="openFull()">⤢</button>
  </div>
  <div class="status" id="status">—</div>
</div>
<audio id="audio" preload="none"></audio>
<script>
const WCP_ORCHESTRATION_ID = "";
const WCP_APPLICATION_ID   = "";
function wcpFetch(url, opts) {
  opts = opts || {};
  const extra = {};
  if (WCP_ORCHESTRATION_ID) extra['Wcp-Orchestration-Id'] = WCP_ORCHESTRATION_ID;
  if (WCP_APPLICATION_ID)   extra['Wcp-Application-Id']   = WCP_APPLICATION_ID;
  opts.headers = Object.assign({}, opts.headers || {}, extra);
  return fetch(url, opts);
}
const audio = document.getElementById('audio');
const btnPlay = document.getElementById('btn-play');
const statusEl = document.getElementById('status');
let currentUrl = '', currentName = '', playing = false;

// Listen for station selection from full player
window.addEventListener('message', e => {
  if (e.data?.type === 'radio:play') {
    currentUrl = e.data.url;
    currentName = e.data.name;
    document.getElementById('sname').textContent = currentName;
    document.getElementById('smeta').textContent = (e.data.country||'') + (e.data.tags ? ' · ' + e.data.tags : '');
    play();
  }
  if (e.data?.type === 'radio:state') {
    // Sync state from control/ticker
    if (e.data.url && e.data.url !== currentUrl) {
      currentUrl = e.data.url;
      currentName = e.data.name || '';
      document.getElementById('sname').textContent = currentName;
    }
  }
});

function play() {
  if (!currentUrl) return;
  audio.src = currentUrl;
  audio.volume = parseFloat(document.getElementById('vol').value);
  audio.play().catch(() => setStatus('error', 'Stream error'));
  playing = true;
  btnPlay.textContent = '⏸';
  setStatus('playing', '● Live');
  broadcast();
}
function stop() {
  audio.pause();
  audio.src = '';
  playing = false;
  btnPlay.textContent = '▶';
  setStatus('', '—');
  broadcast();
}
function togglePlay() { playing ? stop() : (currentUrl ? play() : openFull()); }
function setVol(v) { audio.volume = parseFloat(v); }
function setStatus(cls, txt) { statusEl.className = 'status ' + cls; statusEl.textContent = txt; }
function openFull() {
  let fullUrl = window.location.origin + '/widget/full';
  if (WCP_ORCHESTRATION_ID) fullUrl += '?wcpOrchestrationId=' + encodeURIComponent(WCP_ORCHESTRATION_ID);
  if (WCP_APPLICATION_ID)   fullUrl += (fullUrl.includes('?') ? '&' : '?') + 'wcpApplicationId=' + encodeURIComponent(WCP_APPLICATION_ID);
  window.parent.postMessage({ type: 'wcp:open-window', url: fullUrl, page: 'full', width: 480, height: 600 }, '*');
}
function broadcast() {
  window.parent.postMessage({ type: 'radio:state', url: currentUrl, name: currentName, playing }, '*');
  wcpFetch('/widget/api/state', { method: 'POST', headers: {'Content-Type':'application/json'},
    body: JSON.stringify({ playing, station: currentName }) }).catch(()=>{});
}
audio.addEventListener('error', () => setStatus('error', 'Stream unavailable'));
audio.addEventListener('playing', () => setStatus('playing', '● Live'));
audio.addEventListener('waiting', () => setStatus('', 'Buffering…'));
// Poll server state so compact view reflects any playing component
async function pollState() {
  try {
    const r = await wcpFetch('/widget/api/state');
    const d = await r.json();
    if (d.station && d.station !== currentName) {
      document.getElementById('sname').textContent = d.station;
      document.getElementById('smeta').textContent = d.playing ? '● Playing via another component' : 'Last played';
      currentName = d.station;
    }
  } catch {}
}
setInterval(pollState, 4000);
</script>
</body>
</html>
Source: LED Indicator
The smallest component — a 40×40 minimum masthead control. Red when idle, green when playing. Notice there is no background colour: it is designed to sit on the host's masthead surface.
<!DOCTYPE html>
<html lang="en">
<head>
<meta charset="UTF-8">
<meta name="viewport" content="width=device-width, initial-scale=1.0">
<title>Playing LED</title>
<style>
*{margin:0;padding:0;box-sizing:border-box;}
html,body{width:100%;height:100%;overflow:hidden;background:transparent;display:flex;align-items:center;justify-content:center;}
.led{width:16px;height:16px;border-radius:50%;background:#f85149;box-shadow:0 0 6px rgba(248,81,73,.5);transition:background .4s,box-shadow .4s;}
.led.playing{background:#3fb950;box-shadow:0 0 8px rgba(63,185,80,.7);animation:pulse 1.8s ease-in-out infinite;}
@keyframes pulse{0%,100%{box-shadow:0 0 6px rgba(63,185,80,.5)}50%{box-shadow:0 0 16px rgba(63,185,80,.9)}}
</style>
</head>
<body>
<div class="led" id="led"></div>
<script>
const WCP_ORCHESTRATION_ID = "";
const WCP_APPLICATION_ID   = "";
function wcpFetch(url, opts) {
  opts = opts || {};
  const extra = {};
  if (WCP_ORCHESTRATION_ID) extra['Wcp-Orchestration-Id'] = WCP_ORCHESTRATION_ID;
  if (WCP_APPLICATION_ID)   extra['Wcp-Application-Id']   = WCP_APPLICATION_ID;
  opts.headers = Object.assign({}, opts.headers || {}, extra);
  return fetch(url, opts);
}
async function poll() {
  try {
    const r = await wcpFetch('/widget/api/state');
    const d = await r.json();
    document.getElementById('led').className = d.playing ? 'led playing' : 'led';
  } catch {}
}
poll();
setInterval(poll, 3000);
</script>
</body>
</html>
Source: Radio Control
A wider masthead control (160–240px) showing the current station name and play/stop. Like the LED, it has no background — it inherits from the host theme.
<!DOCTYPE html>
<html lang="en">
<head>
<meta charset="UTF-8">
<meta name="viewport" content="width=device-width, initial-scale=1.0">
<title>Radio Control</title>
<style>
*{margin:0;padding:0;box-sizing:border-box;}
html,body{width:100%;height:100%;overflow:hidden;background:transparent;color:var(--text,#e6edf3);font-family:-apple-system,BlinkMacSystemFont,'Segoe UI',sans-serif;font-size:12px;}
.ctrl{display:flex;align-items:center;gap:8px;height:100%;padding:0 10px;}
.btn{background:none;border:1px solid var(--border,#30363d);border-radius:6px;color:var(--text,#e6edf3);cursor:pointer;width:32px;height:32px;display:flex;align-items:center;justify-content:center;font-size:14px;flex-shrink:0;transition:background .15s;}
.btn:hover{background:rgba(240,136,62,.15);}
.btn.playing{color:var(--accent,#f0883e);border-color:var(--accent,#f0883e);}
.info{flex:1;min-width:0;}
.sname{font-size:12px;font-weight:500;white-space:nowrap;overflow:hidden;text-overflow:ellipsis;}
.status{font-size:10px;color:var(--muted,#8b949e);}
.status.playing{color:var(--green,#3fb950);}
.btn-open{background:none;border:none;color:var(--muted,#8b949e);cursor:pointer;font-size:16px;padding:0 2px;flex-shrink:0;}
.btn-open:hover{color:var(--accent,#f0883e);}
</style>
</head>
<body>
<div class="ctrl">
  <button class="btn" id="btn-play" onclick="togglePlay()">▶</button>
  <div class="info">
    <div class="sname" id="sname">Radio</div>
    <div class="status" id="status">No station</div>
  </div>
  <button class="btn-open" onclick="openFull()" title="Open full player">⤢</button>
</div>
<audio id="audio" preload="none"></audio>
<script>
const WCP_ORCHESTRATION_ID = "";
const WCP_APPLICATION_ID   = "";
function wcpFetch(url, opts) {
  opts = opts || {};
  const extra = {};
  if (WCP_ORCHESTRATION_ID) extra['Wcp-Orchestration-Id'] = WCP_ORCHESTRATION_ID;
  if (WCP_APPLICATION_ID)   extra['Wcp-Application-Id']   = WCP_APPLICATION_ID;
  opts.headers = Object.assign({}, opts.headers || {}, extra);
  return fetch(url, opts);
}
const audio = document.getElementById('audio');
let currentUrl = '', playing = false;

window.addEventListener('message', e => {
  if (e.data?.type === 'radio:state') {
    currentUrl = e.data.url;
    document.getElementById('sname').textContent = e.data.name || 'Radio';
    if (e.data.playing !== playing) {
      playing = e.data.playing;
      sync();
    }
  }
});

function togglePlay() {
  if (!currentUrl) { openFull(); return; }
  playing ? stop() : play();
}
function play() {
  audio.src = currentUrl;
  audio.play().catch(() => {});
  playing = true; sync();
  window.parent?.postMessage({ type: 'radio:state', url: currentUrl, playing: true }, '*');
  wcpFetch('/widget/api/state', { method: 'POST', headers: {'Content-Type':'application/json'},
    body: JSON.stringify({ playing: true, station: document.getElementById('sname').textContent, station_url: currentUrl }) }).catch(()=>{});
}
function stop() {
  audio.pause(); audio.src = '';
  playing = false; sync();
  window.parent?.postMessage({ type: 'radio:state', url: currentUrl, playing: false }, '*');
  wcpFetch('/widget/api/state', { method: 'POST', headers: {'Content-Type':'application/json'},
    body: JSON.stringify({ playing: false, station: document.getElementById('sname').textContent }) }).catch(()=>{});
}
function sync() {
  const btn = document.getElementById('btn-play');
  const st = document.getElementById('status');
  btn.textContent = playing ? '⏸' : '▶';
  btn.className = playing ? 'btn playing' : 'btn';
  st.className = playing ? 'status playing' : 'status';
  st.textContent = playing ? '● Live' : (currentUrl ? 'Stopped' : 'No station');
}
function openFull() {
  let fullUrl = window.location.origin + '/widget/full';
  if (WCP_ORCHESTRATION_ID) fullUrl += '?wcpOrchestrationId=' + encodeURIComponent(WCP_ORCHESTRATION_ID);
  if (WCP_APPLICATION_ID)   fullUrl += (fullUrl.includes('?') ? '&' : '?') + 'wcpApplicationId=' + encodeURIComponent(WCP_APPLICATION_ID);
  window.parent?.postMessage({ type: 'wcp:open-window', url: fullUrl, page: 'full', width: 480, height: 600 }, '*');
}
audio.addEventListener('error', () => { playing = false; sync(); });
// Poll server state — only update display/URL if WE are not playing
async function pollState() {
  try {
    const r = await wcpFetch('/widget/api/state');
    const d = await r.json();
    if (!playing) {
      // Not playing locally — reflect server state
      if (d.station) document.getElementById('sname').textContent = d.station;
      if (d.station_url) currentUrl = d.station_url;
    }
    // If WE are playing but server says stopped (e.g. full player closed),
    // re-assert our state so LED and ticker stay green
    if (playing && !d.playing) {
      wcpFetch('/widget/api/state', { method: 'POST', headers: {'Content-Type':'application/json'},
        body: JSON.stringify({ playing: true, station: document.getElementById('sname').textContent, station_url: currentUrl }) }).catch(()=>{});
    }
  } catch {}
}
setInterval(pollState, 4000);
window.addEventListener('beforeunload', () => {
  wcpFetch('/widget/api/state', { method: 'POST', keepalive: true,
    headers: {'Content-Type':'application/json'},
    body: JSON.stringify({ playing: false }) });
});
</script>
</body>
</html>
Source: Ticker
A scrolling masthead ticker. Polls /widget/api/state and scrolls the
station name when playing. Stops and clears when idle.
<!DOCTYPE html>
<html lang="en">
<head>
<meta charset="UTF-8">
<meta name="viewport" content="width=device-width, initial-scale=1.0">
<title>Radio Ticker</title>
<style>
*{margin:0;padding:0;box-sizing:border-box;}
html,body{width:100%;height:100%;overflow:hidden;background:transparent;color:var(--text,#e6edf3);font-family:-apple-system,BlinkMacSystemFont,'Segoe UI',sans-serif;font-size:12px;}
.ticker{display:flex;align-items:center;height:100%;gap:8px;padding:0 10px;overflow:hidden;}
.icon{color:var(--accent,#f0883e);font-size:14px;flex-shrink:0;}
.marquee{flex:1;overflow:hidden;white-space:nowrap;}
.marquee-inner{display:inline-block;animation:scroll 20s linear infinite;}
.marquee-inner:hover{animation-play-state:paused;}
@keyframes scroll{0%{transform:translateX(100%)}100%{transform:translateX(-100%)}}
.dot{width:6px;height:6px;border-radius:50%;background:var(--green,#3fb950);flex-shrink:0;display:none;}
.dot.visible{display:block;}
</style>
</head>
<body>
<div class="ticker">
  <div class="dot" id="dot"></div>
  <span class="icon">📻</span>
  <div class="marquee"><span class="marquee-inner" id="text">No station playing — click Radio to get started</span></div>
</div>
<script>
const WCP_ORCHESTRATION_ID = "";
const WCP_APPLICATION_ID   = "";
function wcpFetch(url, opts) {
  opts = opts || {};
  const extra = {};
  if (WCP_ORCHESTRATION_ID) extra['Wcp-Orchestration-Id'] = WCP_ORCHESTRATION_ID;
  if (WCP_APPLICATION_ID)   extra['Wcp-Application-Id']   = WCP_APPLICATION_ID;
  opts.headers = Object.assign({}, opts.headers || {}, extra);
  return fetch(url, opts);
}
function updateTicker(playing, name) {
  const dot = document.getElementById('dot');
  const text = document.getElementById('text');
  if (playing && name) {
    dot.className = 'dot visible';
    text.textContent = '● Now playing: ' + name;
  } else {
    dot.className = 'dot';
    text.textContent = name ? name + ' — stopped' : 'No station playing — click Radio to get started';
  }
}
// Listen for in-page messages
window.addEventListener('message', e => {
  if (e.data?.type === 'radio:state') updateTicker(e.data.playing, e.data.name);
});
// Also poll server state directly (works when full player is in separate window)
async function pollState() {
  try {
    const r = await wcpFetch('/widget/api/state');
    const d = await r.json();
    updateTicker(d.playing, d.station);
  } catch {}
}
pollState();
setInterval(pollState, 3000);
</script>
</body>
</html>
CSS Theme Variables
WCP-compliant hosts inject a set of CSS custom properties into :root before
rendering any widget iframe. Widgets that reference these variables using var(--name)
automatically inherit the host's current theme — dark mode, light mode, high contrast — without
any change to widget code.
The Theme Studio widget (penrithbeacon/wcp-widget-theme-studio on Docker Hub)
is the canonical reference for these variables. Pull it, run it on port 3740, and open
http://localhost:3740/widget/full in your browser. Browse the built-in themes
and you will see exactly how the palette shifts across themes while the variable names stay
constant.

The WCP Theme Studio full page. Left panel: the built-in theme palette — each entry is a complete set of the 13 CSS custom properties. Centre: a live preview of the selected theme applied to standard HTML controls (buttons, inputs, badges, cards) — exactly what your widget will look like inside a host using this theme. Right panel: the theme editor where you can modify any variable value or create an entirely new theme from scratch.
Once you have a theme you want to use or distribute, click the export button. A modal appears showing the complete CSS block ready to copy or download:
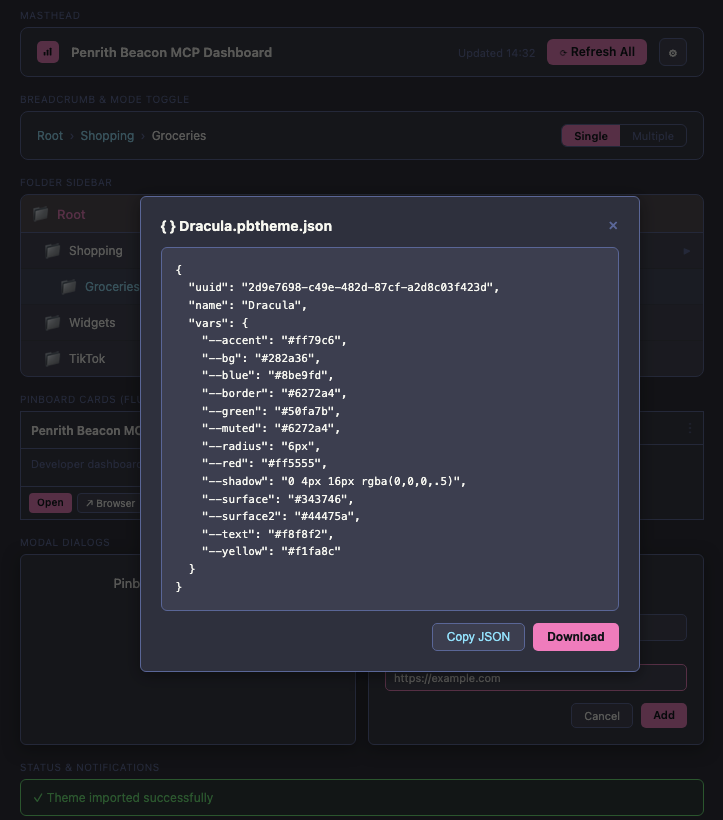
Exporting a theme's CSS.
The modal shows the full set of CSS custom property declarations for the selected theme.
Click Copy to paste directly into your widget's stylesheet, or
Download to save it as a .json file for sharing or
importing into another dashboard. These are exactly the variable names your widget should
reference using var(--bg), var(--accent), and so on.
| Variable | Purpose | Typical dark value |
|---|---|---|
--bg | Page / outermost background | #0d1117 |
--surface | Card and panel backgrounds | #161b22 |
--surface2 | Inputs, secondary surfaces | #1c2128 |
--border | Dividers and input borders | #30363d |
--text | Primary text colour | #e6edf3 |
--muted | Secondary / placeholder text | #8b949e |
--accent | Primary action colour (buttons, highlights) | #f0883e |
--green | Success / playing / live states | #3fb950 |
--red | Error / stopped / warning states | #f85149 |
--yellow | Warning / pending states | #d29922 |
--blue | Informational / link colour | #58a6ff |
--radius | Border radius for rounded elements | 8px |
--shadow | Box shadow for elevated elements | 0 4px 16px rgba(0,0,0,.45) |
To use them in your widget:
/* In your widget's CSS: */
body { background: var(--bg); color: var(--text); }
button { background: var(--accent); color: #000; border-radius: var(--radius); }
input { background: var(--surface2); border: 1px solid var(--border); color: var(--text); }
If the host does not inject these variables (for example, when you open the widget
directly in a browser), the values fall back to the browser defaults. Design accordingly —
either set a sensible fallback in var(--bg, #0d1117) or accept that the widget
will look different when viewed outside a host. The Radio widget opts for no background
on its podium components, so they work on any host surface.
Reference
All WCP endpoints
| Path | Method | Required | Purpose |
|---|---|---|---|
| /widget/wcp | GET | required | WCP manifest JSON |
| /widget/health | GET | required | Health check |
| /widget/ | GET | required | Main widget iframe page |
| /widget/icon.svg | GET | required | Widget icon (SVG) |
| /widget/configure | POST | optional | Receive configuration from host |
| /widget/full | GET | optional | Full-view page |
| /widget/export.wcp | GET | optional | Downloadable .wcp package (manifest + icon + docs) |
| /widget/api/guids | GET | optional | Returns component UUIDs for .wcpo import matching |
| /widget/api/search | GET | optional | Autocomplete suggestions for autocomplete config fields |
| /wcp | GET | optional | Container Directory (multi-widget containers) |
All WCP request headers
| Header | WCP | Purpose |
|---|---|---|
| Wcp-Instance-Id | 1.3.1+ | UUID for this widget placement — key configuration storage by this value |
| Wcp-Dashboard-Id | 1.3.1+ | UUID identifying the host dashboard — for logging and analytics |
| Wcp-Version | 1.3.1+ | WCP protocol version the host is speaking (e.g. 1.5.0) |
| Wcp-Widget-Id | 1.4.0+ | Component ID within a multi-widget container |
| Wcp-Orchestration-Id | 1.5.0+ | UUID of the currently active orchestration — key runtime state by this value |
| Wcp-Application-Id | 1.5.0+ | UUID of the active application window (kiosk only) — combine with orchestration ID for full isolation |
State key pseudocode
The canonical algorithm for deriving a compound state key from WCP 1.5.0 context headers:
FUNCTION get_state_key(request):
    orch_id ← request.header("Wcp-Orchestration-Id") OR ""
    app_id  ← request.header("Wcp-Application-Id")  OR ""

    IF orch_id AND app_id:
        RETURN orch_id + ":" + app_id
    IF orch_id:
        RETURN orch_id
    RETURN "global"   // fallback for hosts that pre-date WCP 1.5.0